You need to know this before going to buy an AVR microcontroller like ATMEGA328 IC. The reality you can’t use directly this IC for doing any electronics projects or replacing the new IC on Arduino. In this both conditions the project code in not get installed unless you burn bootloader on your new ATMEGA328 IC.
So here I will show how to burn bootloader code to new ATMEGA328, ATMEGA328p, and ATMEGA328-AU IC. After burning the bootloader, you can use the IC as standalone a custom electronics project or PCB. Simply burn the bootloader first then install your project code.
Introduction
The Arduino board is built with ATMEGA328 IC. When you are uploading any Arduino project code to your board will store it in memory. After the code upload, it works based on the uploaded code. But the Arduino board is costly, Arduino UNO or Arduino nano board can run a single code at a time or a single project at a time.
Buying more Arduino boards is too much cost. During this time we go through buying Arduino IC and uploading code on it. But this is not simple, to upload project code to a new IC you need to do some steps on them. This is called bootloader burning to ATMEGA328 IC.
What is ATMEGA328 Bootloader?
A bootloader is a small piece of code to runs the uploading code. The bootloader in Arduino is allowed to program over the serial port of the Arduino IC. The job of the bootloader is to accept the code and saving in its microcontroller memory.
Why Bootloader is Needed in ATMEGA328?
Bootloader is a simple program that allows you to load programs via a USB cable. At the beginning, the bootloader checks the uploaded code and initializes it. If there is no upload available it’s ready to receive a new code through USB upload.
So bootloader allows microcontroller to save uploaded code on its memory efficiently. Also, execute at the required time. The bootloader is very important in new AVR Microcontroller programming.
Burning Bootloader on ATMEGA328
Here are the easy steps given to burn the bootloader on ATMEGA328 IC. The major extract of the burning bootloader is pointed out below. To burn the bootloader, follow the steps:
- Plug the Arduino UNO board into your laptop or pc. Open Arduino IDE software and upload the Arduino ISP sketch from Files.
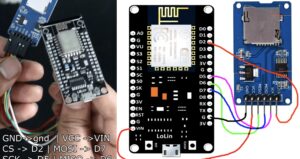
- Wire the circuit using the new ATMEGA328 IC ( The circuit diagram is given below ).
- Check the number of the IC carefully, if it is ATMEGA328 select Atmega328 in the software.
- Select Arduino as ISP from tool > Programmer
- Then click Burn bootloader.
Burning Bootloader Step-by-Step
The complete step-by-step guide for burning a bootloader to Atmega328 IC. Follow the seps to successfully upload the bootloader on the microcontroller.
Installing Mini Core
The mini core is a hardware package that adds different types of Arduino IC programming setups. So you need to install it first. To install Minicore on Arduino IDE software follow the steps.
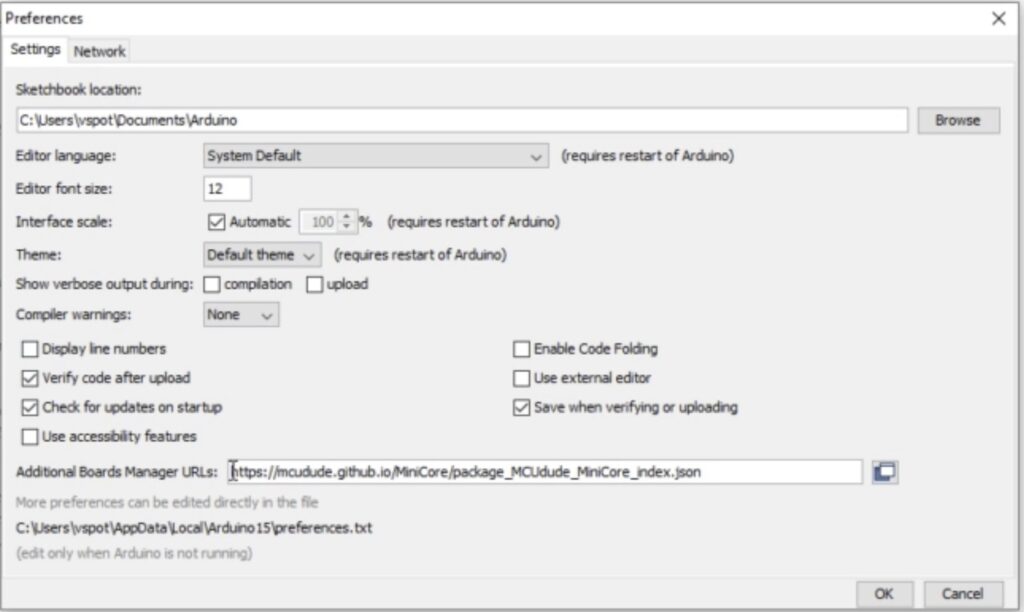
- Open Arduino IDE software > Files > preferences
- At the bottom of the pop-up window, an additional board manager url is there.
- Paste this code in the box, ( without ‘’ )the URL is “https://mcudude.github.io/MiniCore/package_MCUdude_MiniCore_index.json”
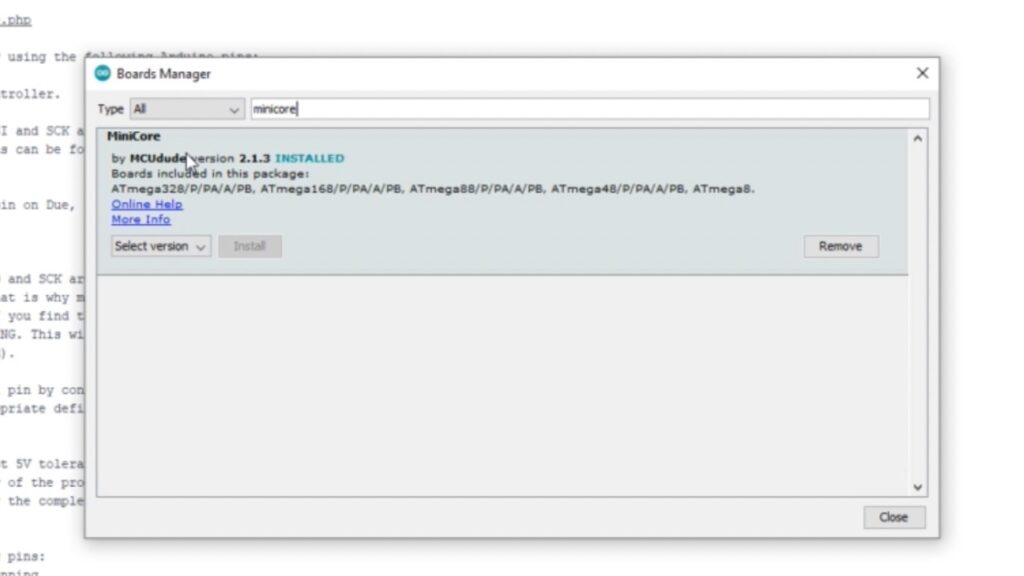
- Navigate to Board Manager Tools > Board > Board manager
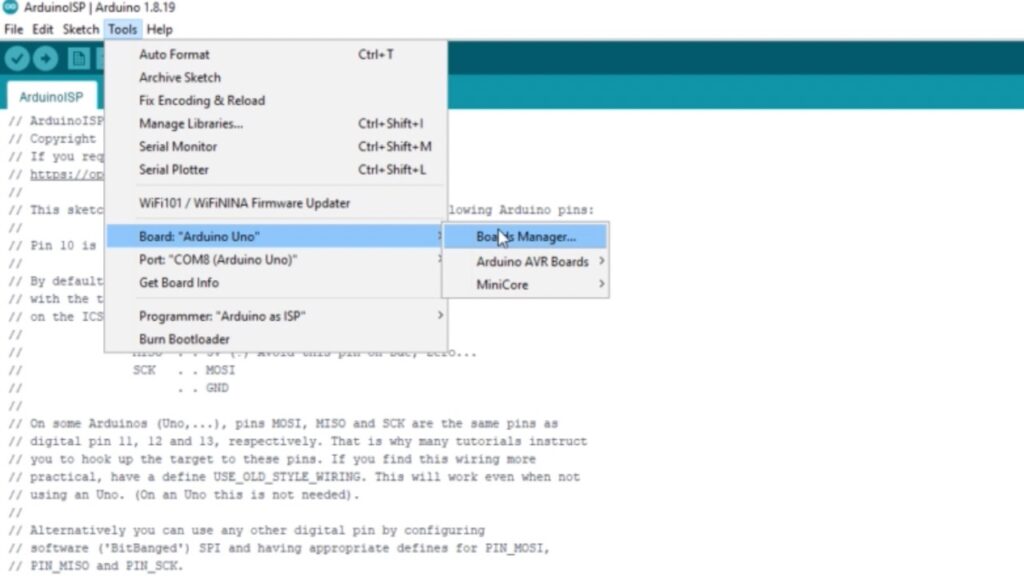
- Search Mini core and click Install
Upload Arduino ISP
- Connect Arduino Uno using a USB cable and connect it to your PC.
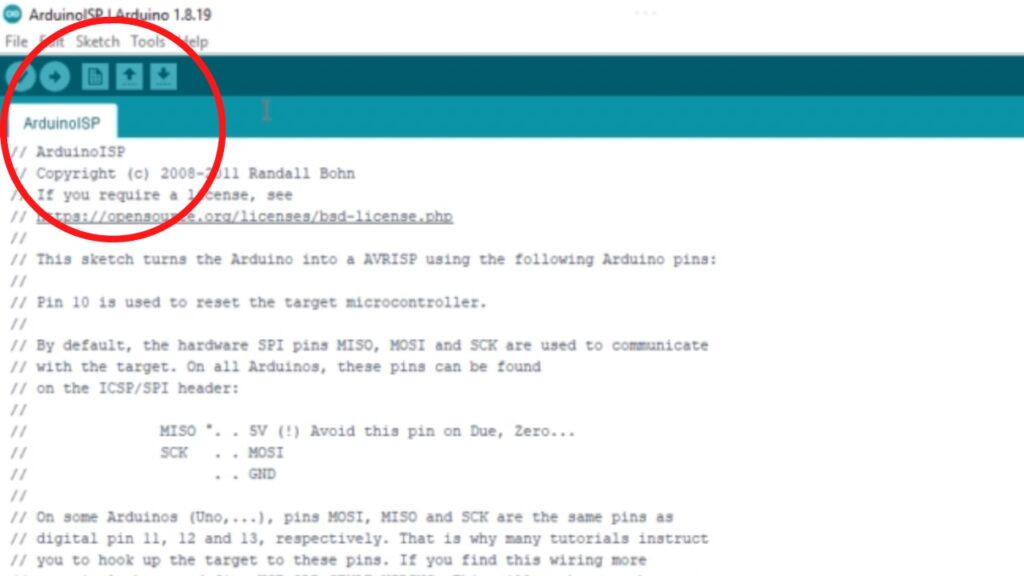
- Then go to files > Examples > ArduinoISP
- An ArduinoISP code will pop up in the new Arduino IDE task then click to upload the code.
Atmega328 Bootloader Circuit
To burn the bootloader on the new ATMEGA328 IC. Connect the IC as per the circuit diagram.
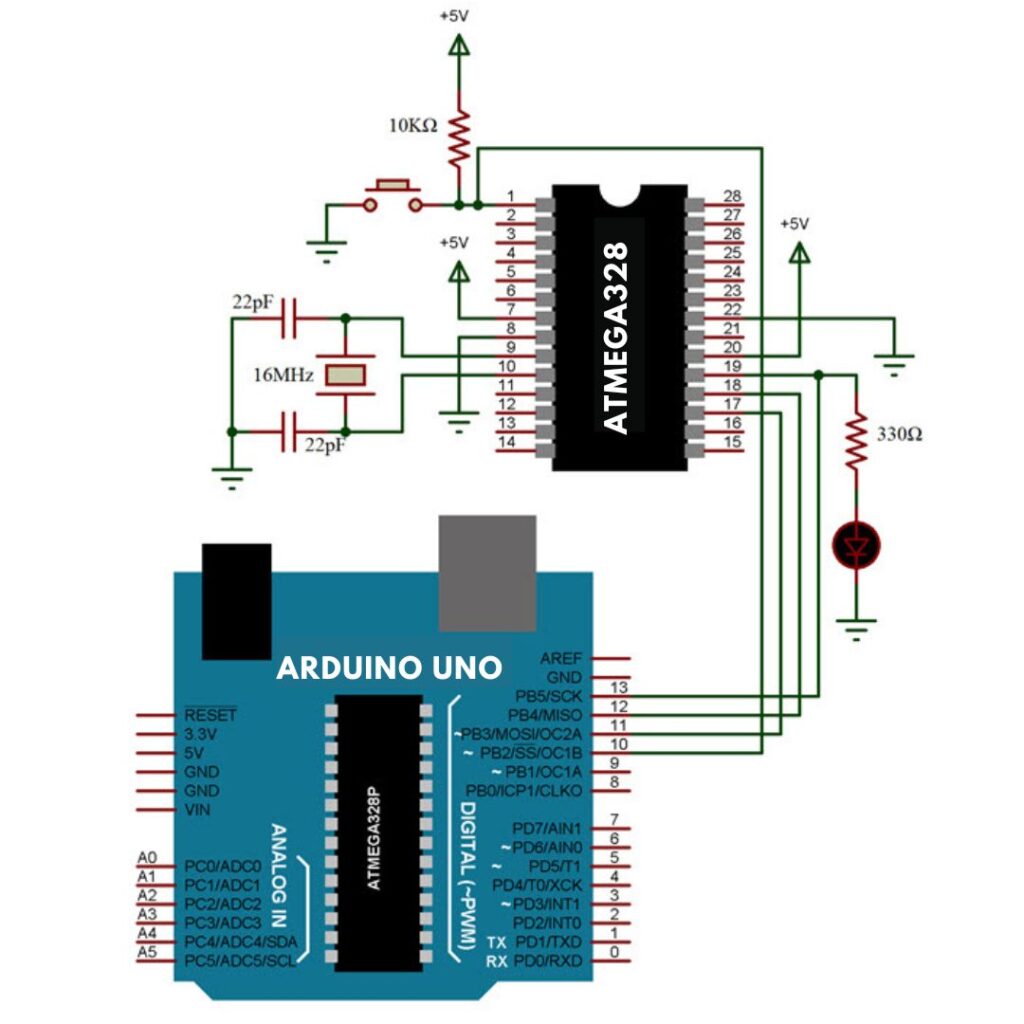
ATMEGA328 IC Bootloader Connection
| Arduino Uno Board | ATMEGA328 IC PIN |
| Pin 13 ( PB5 ) | Pin 19 |
| Pin 12 ( PB4 ) | Pin 18 |
| Pin 11 (PB3 ) | Pin 17 |
| Pin 10 (PB2 ) | Pin 1 ( Reset pin ) |
| 5v | 5v |
| Gnd | Gnd |
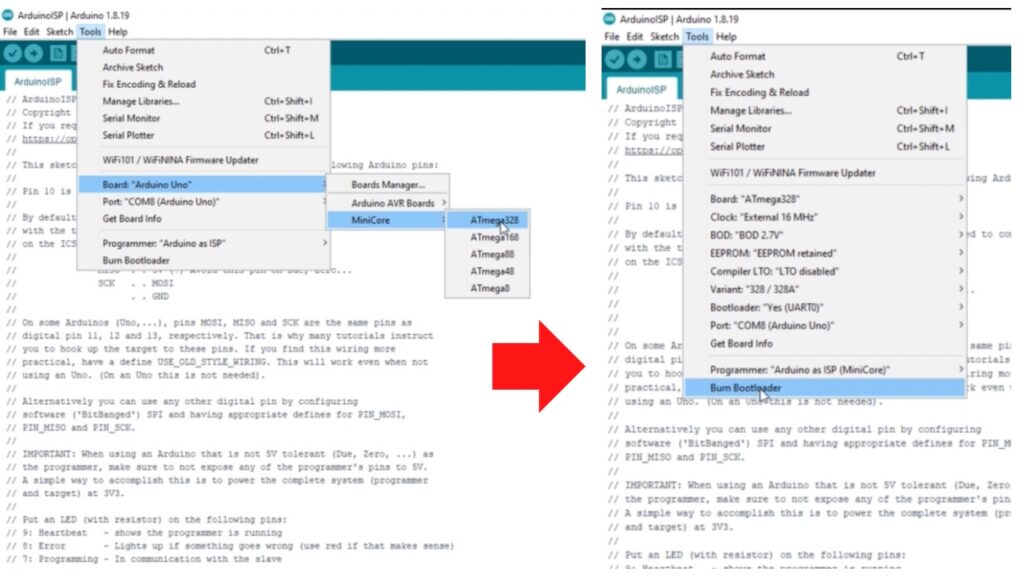
Select Device, Crystal, and Programmer to Burn bootloader
- After a successful connection plug the USB into Arduino and re-connect it to your PC.
- Select New IC number, Crystal, and Programmer. From the tool menu
- After proper selection Click Burn bootloader.
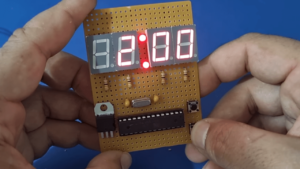
Now the new ATMEGA328 IC bootloader burning is finished. Now remove the IC from the breadboard and replace the original IC with a new IC to Upload your project code to run. That’s it, you are done. If you have any doubts check the YouTube video Tutorial.
YouTube Video Tutorial
Also Check : Arduino Uno Electronics Projects