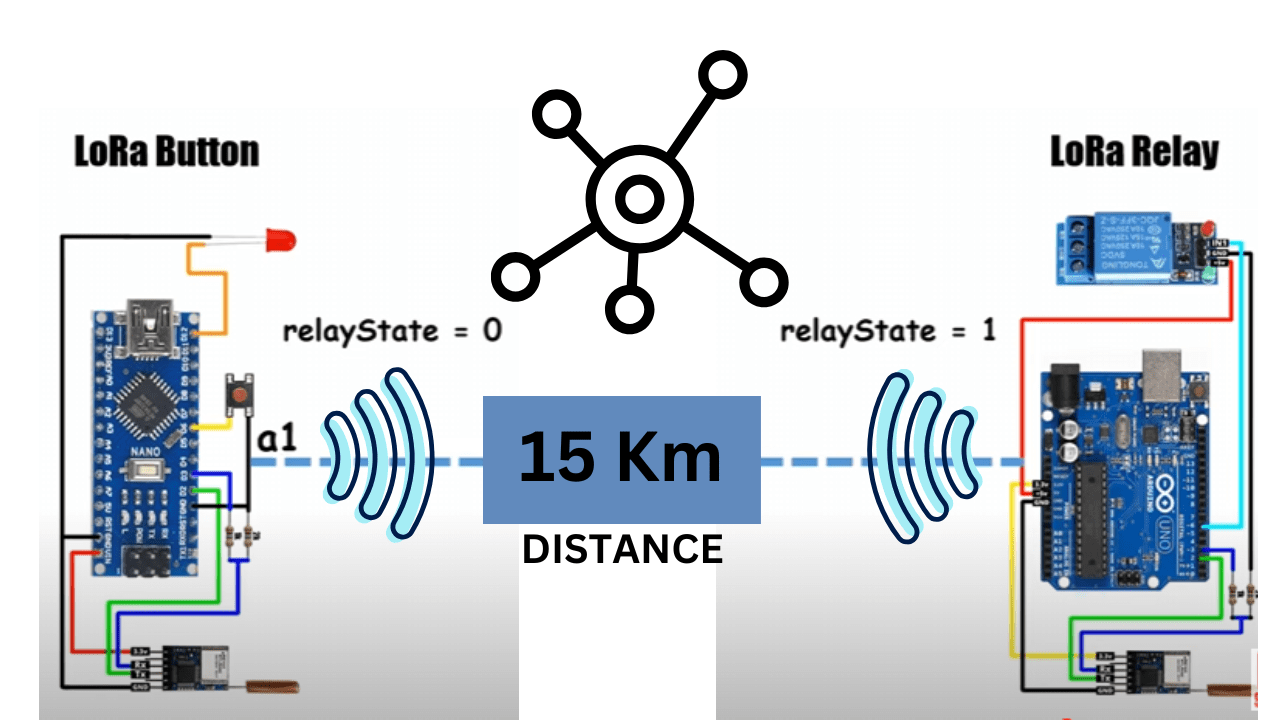
Hello, friends today I will show you how to control a relay using a Lora module with a range of up to 15 km. Here is am using a transmitter and a receiver device, both connected to a LoRa module.
I have connected a button to the transmitter, I can control the relay by pressing the transmitter the same button will be used to turn on or off the relay on the receiver device. to ensure smooth communication between both devices an LED status is connected with the transmitter.
The receiver continuously sends the relay status back to the transmitter at regular intervals of 3 seconds.
you may notice the LED connected in the transmitter side continuously indicating the relay status is being received from the receiver device. This synchronization process ensures that both devices have the same relay status at the same time.
This process is required to handle any data loss that may occur during the data transmission.
Components require
- Relay module
- Arduino nano
- Arduino Uno
- RYLR406 LoRa module
- Push button
- LED
- 1K and 2K resistor
LoRa module Transmitter Circuit and its Connection

LoRa module is a 3.3v device so I have powered it using the 3.3v pin of Arduino and I have attached a voltage divider to the RX pin of the Lora module to convert the 5V signal to 3.3v which is compatible with the Lora module.
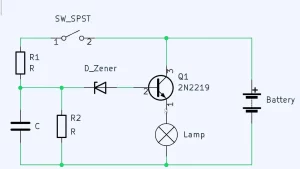
RYLR406-based LoRa module Transmitter Circuit diagram

LoRa Relay Circuit (Receiver) and its Connection
Let’s have a look at the wiring the diagram of the receiver device is given here. Make sure to double-check all connections to prevent any damage to the hardware. from the Arduino Uno PIN 3 connected to the Rx pin of the LoRa module the TX pin to the PIN 2 of Arduino. The relay control signal is taken from the Arduino PIN 6.

Download Programming files for LoRa Remote and Reciever
- LoRa Remote Arduino nano Programming code
- LoRa Realay or Reciever programming Arduino Uno code