Introduction
The number of heart illness-related conditions is rising day by day. Most of the people die due to heart failure. These heat problems can be detected at the early stage using the ECG machine (Echocardiogram).
The ECG machines are available at Hospitals only, so they can not be accessible to the patient all the time. If you want to buy those devices, it is very costly.
In this article I would like to support the people who are suffering from the illness, The homemade ECG machine. Yes, it is possible to build an ECG machine using Arduino. The detailed guide and codes for How to Make an ECG Machine Using Arduino is here.
AD8232 ECG Sensor
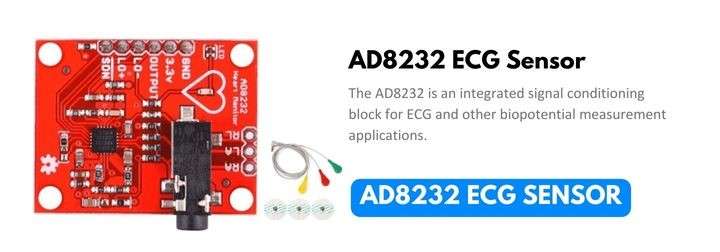
The AD8232 is the sensor that detects the activity of the heart. The heart is beating based on the electrical pulse ( minute voltage) is generating on the heart. The ECG sensor will detect the electrical pulse while heat is beating. The electrical activity will be charted with the help of an Arduino program.
Additional Information of AD8232 Sensor
- The sensor is designed to amplify and filter the small biopotential signals by placing the electrodes on the human body.
- The accuracy value of this sensor is about 50.35%, and the sensitivity value is about 97.63%.
- The module will work with the rated voltage of 3.3V dc.
- The module consists of an inbuilt LED on it,n This will indicate the heart beat rhythm of the human.
- The 3 measuring electrodes should be placed on the human body properly for accurate reading.
AD8232 Pinout Configuration
| PIN NAME | This is the control input for the shutdown |
|---|---|
| Gnd | Ground connection 9Negative supply) |
| 3.3v | Positive supply voltage input pin |
| Output | Output signal |
| LO- | Lead-off detect – |
| LO+ | Leads off detect + |
| SDN | This is the control input for shutdown |
| RA (right arm) | Red Biomedical electrode pad in |
| LA (left arm) | Yellow biomedical electrode pad in |
| RL (Right leg) | Green biomedical electrode pad in |
| 3.5mm ECG Biomedical Electrode connector jack | The biomedical electrode connector RA,LA, RL |
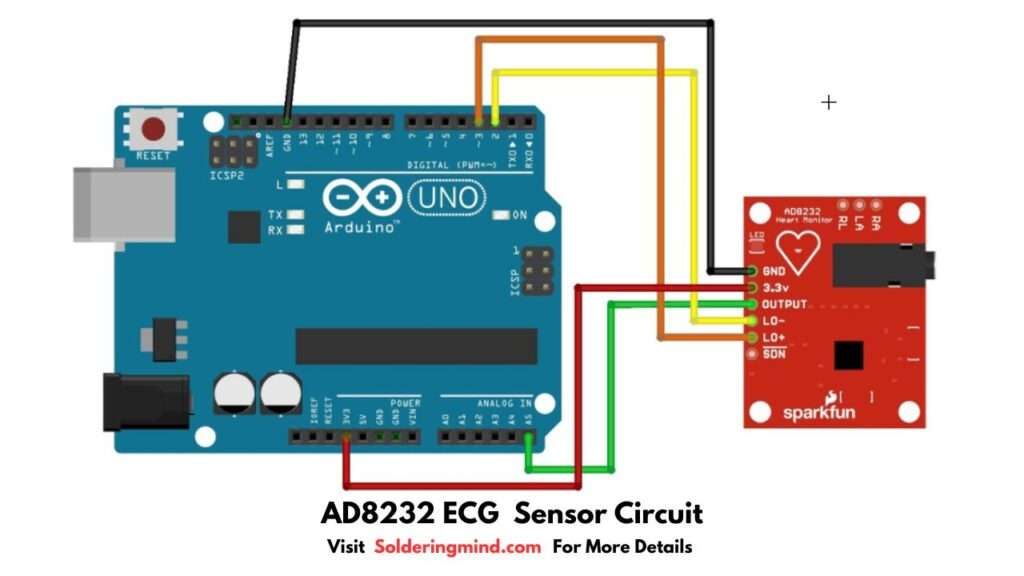
Circuit Diagram
Components Required
| Components | Quantity |
|---|---|
| Arduino UNO | 1 |
| ECG Module | 1 |
| USB cable | 1 |
| Jumper wire | – |
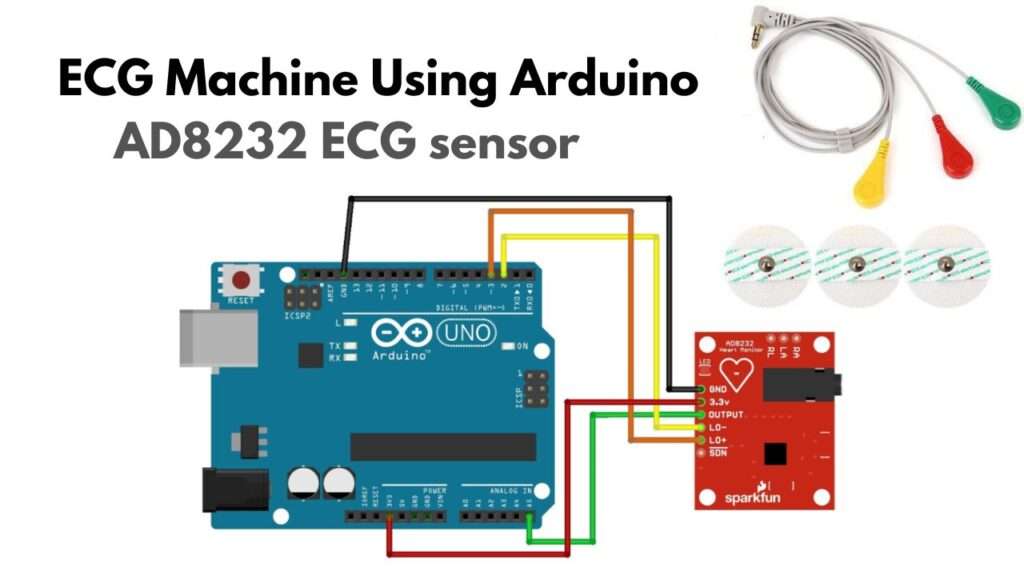
ECG Sensor and Arduino Uno Connection Table
| Arduino UNO | AD8232 Heart rate monitor board |
| 3.3v | 3.3v |
| Gnd | Gnd |
| D2 | LO- |
| D3 | LO+ |
| A5 | Output |
Arduino Programming Code
void setup() {
  // initialize the serial communication:
  Serial.begin(9600);
  pinMode(3, INPUT); // Setup for leads off detection LO +
  pinMode(2, INPUT); // Setup for leads off detection LO -

}

void loop() {

  if((digitalRead(10) == 1)||(digitalRead(11) == 1)){
    Serial.println('!');
  }
  else{
    // send the value of analog input 0:
      Serial.println(analogRead(A5));
  }
  //Wait for a bit to keep serial data from saturating
  delay(1);
}
Hardware Connection
Connect the ECG module to the Arduino based on the connection table. Ensure the proper connections you have made before connecting to the power supply.
Uploading Code and Monitoring
- Upload the given code to the Arduino UNo using your USB cable. After successful uploading of the code you need to go to the Arduino IDE to navigate, Tool > select Serial plotter
- Set the bud rate in the serial plotter at about 9600
- The serial plotter will show the real graph of the ECG data received from the module.