Introduction
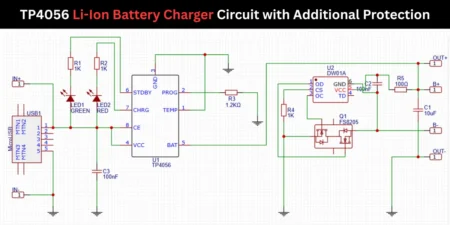
This simple lithium-ion battery charger circuit also consists of an additional circuit of thermal protection. The maximum current of 1000mA or 1A can be provided linearly to the connected battery. You can only charge a single lithium-ion battery at a time using this IC circuit.
This circuit is best for the single cell lithium ion batteries; the major advantage of this circuit is about the constant current of charging. The fixed charging voltage is around 4.2V DC. The circuit also comes with additional features like overcharge protection, over discharge and short circuit protection. The TP4056 IC needs only a small number of electronic components to build this circuit.
How long does it take to charge a battery using TP4056?
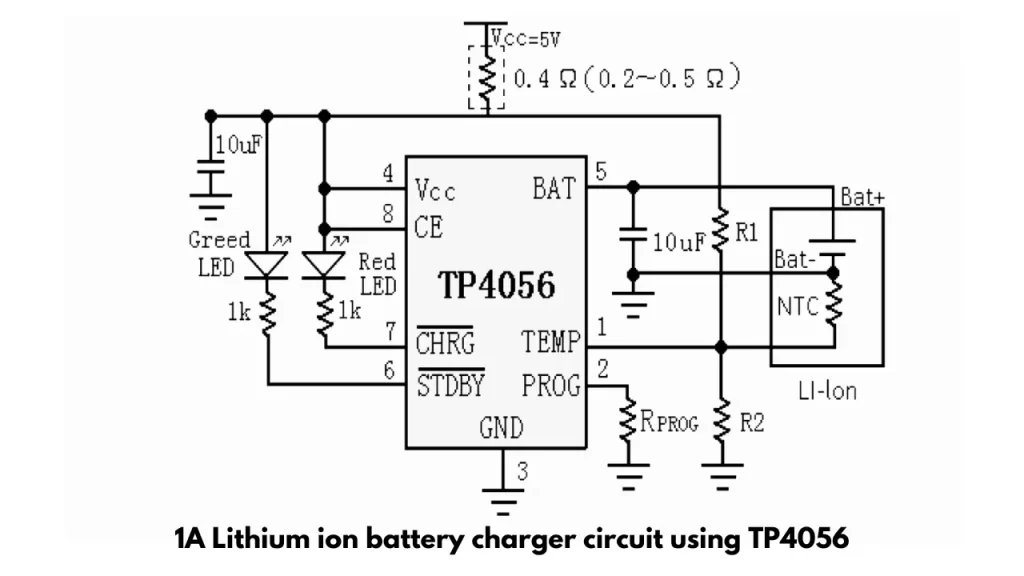
The charging current of the circuit is adjusted by changing the resistor value of Rprog Connected to the Prog pin of the IC. The formula for the Charging current calculator is,
Charging current = 1200/Rprog
Where the Current is in mA and the Rprog is in ohms. The Rprog value is 1.2K, which means the charging current will be 1 A. So now we can calculate the time to charge a 2000mAh battery. The charging circuit provides 1A for so the battery needs 2 hours to charge completely because the battery is about 2A. Charging time = 2000mA / 1000mA
The charging calculation is just a mathematical equation; all the time the charging current is not linear. The IC will reduce the current when the battery voltage reaches 4.2v. So the actual charging time may vary. The actual charging and standby mode is indicated by then 2 LED’s. While the battery is charging, the red LED turns on, and the green one turns off. The battery gets fully charged when the green LED turns on.
Circuit Diagram
You’ll Also like this
- Simple NiCd Battery Charger Circuit
- Battery Charging Time Calculator
- Dual Power Supply from Single Battery


Tp4057