
Did you worrying about The rotary encoder is working properly or not ? Don’t worry here is the proper tutorial about how to troubleshoot rotary encoder. You can easily test your rotary encoder using Arduino Uno or Nano. so Follow through all the steps don’t skip anything lets we do together.
Rotary Encoder Troubleshooting
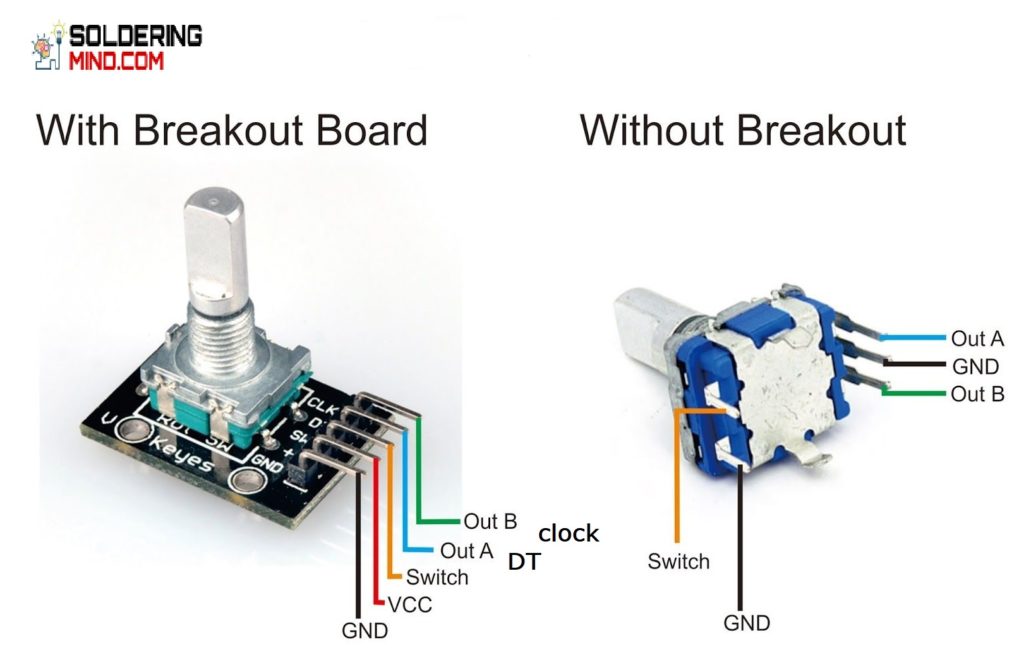
First you needs to connect the rotary encoder pins to the Arduino. The clear image of Arduino rotary encoder wiring has to be given below. study the connections properly and don’t connect the wires on any other pin in the Arduino. properly connect the rotary encoder pins using male to female pins, much easiest way.
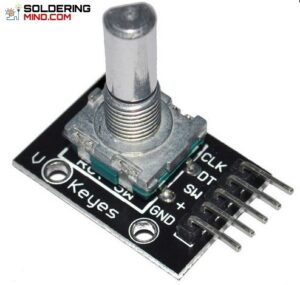
Rotary encoder pinout
Explaining about the pinout of rotary encoder, The rotary encoder module contains a 5 pin connections which are
| PINOUT | FUNCION |
|---|---|
| CLK | CONTACT B OUTPUT CLOCK |
| DT | CONTACT A OUTPUT DATA |
| SW | OUTPUT OF INTERNAL BUTTON |
| +VE | CONNECTING 5V +VE SUPPLY |
| GND | CONNECTED TO GROUND |
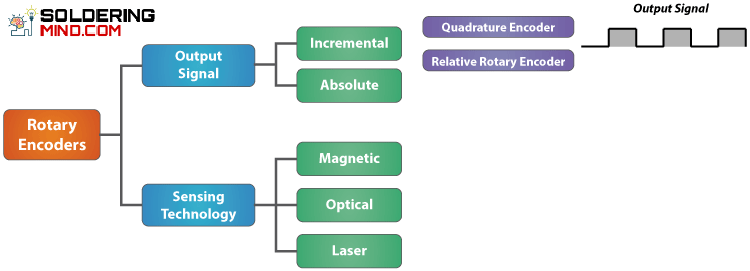
Rotary encoder specification
The rotary encoder having the specifications of
- 360 degree free rotation has to be possible.
- 20 steps of means cycles per revolution.
- This is a incremental type of encoder.
- Easy interface has to be providing
- Long life as comparing with other electronic components like liner pot.
Troubleshooting Arduino code For Programming
// Rotary Encoder Inputs
#define CLK 2
#define DT 3
#define SW 4

int counter = 0;
int currentStateCLK;
int lastStateCLK;
String currentDir ="";
unsigned long lastButtonPress = 0;

void setup() {

  // Set encoder pins as inputs
  pinMode(CLK,INPUT);
  pinMode(DT,INPUT);
  pinMode(SW, INPUT_PULLUP);

  // Setup Serial Monitor
  Serial.begin(9600);

  // Read the initial state of CLK
  lastStateCLK = digitalRead(CLK);
}

void loop() {

  // Read the current state of CLK
  currentStateCLK = digitalRead(CLK);

  // If last and current state of CLK are different, then pulse occurred
  // React to only 1 state change to avoid double count
  if (currentStateCLK != lastStateCLK  && currentStateCLK == 1){

    // If the DT state is different than the CLK state then
    // the encoder is rotating CCW so decrement
    if (digitalRead(DT) != currentStateCLK) {
      counter --;
      currentDir ="CCW";
    } else {
      // Encoder is rotating CW so increment
      counter ++;
      currentDir ="CW";
    }

    Serial.print("Direction: ");
    Serial.print(currentDir);
    Serial.print(" | Counter: ");
    Serial.println(counter);
  }

  // Remember last CLK state
  lastStateCLK = currentStateCLK;

  // Read the button state
  int btnState = digitalRead(SW);

  //If we detect LOW signal, button is pressed
  if (btnState == LOW) {
    //if 50ms have passed since last LOW pulse, it means that the
    //button has been pressed, released and pressed again
    if (millis() - lastButtonPress > 50) {
      Serial.println("Button pressed!");
    }

    // Remember last button press event
    lastButtonPress = millis();
  }

  // Put in a slight delay to help debounce the reading
  delay(1);
}
Connect CLK to the 2, DT to 3, SW to 4 the pin of the Arduino. and next install the code and click on the serial monitor and rotate the encoder to see the working.
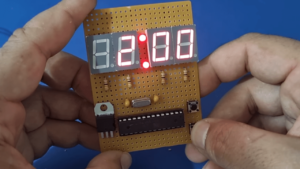
Working: Block diagram


Dear Sir/ Madam,
kindly can you inform me what is the resolution of the above rotary encoder in bits?
Thank you